How to Run a Flask Project in IIS: A Step-by-Step Guide
In my work, I encountered the challenge of deploying a Flask project on Windows, but I was unsure how to proceed. After searching online, I found that many articles were unhelpful. However, I eventually discovered the solution, and I would like to share how I successfully accomplished it.
Running a Flask application on Internet Information Services (IIS) is a great way to host Python web applications on a Windows server. IIS is a flexible, secure, and manageable web server for hosting anything on the web. In this article, we will walk through the process of setting up and running a Flask project in IIS with practical examples.
Prerequisites
Step 1: Install IIS and Configure CGI
-
Install IIS: If IIS is not already installed, you can install it by opening the Control Panel → Programs and Features → Turn Windows features on or off. Check the box for Internet Information Services and select OK.
-
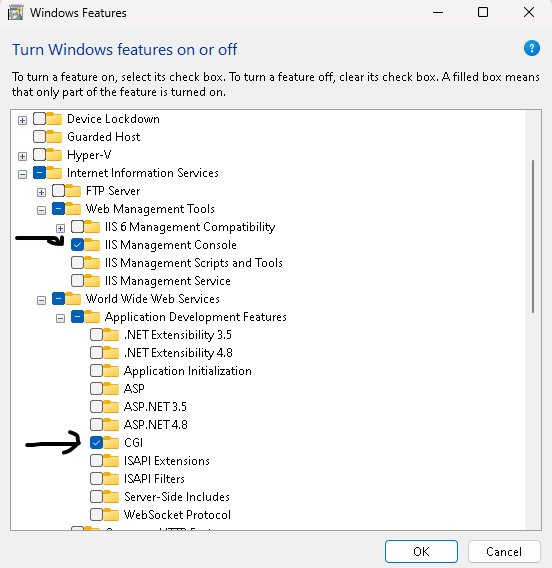
Enable CGI: Under the same IIS features, ensure that CGI is installed. This allows IIS to execute Python scripts.
- Go to Control Panel → Programs and Features → Turn Windows features on or off.
- Expand Internet Information Services → Web Management Console
- Expand Internet Information Services → World Wide Web Services → Application Development Features.
- Check CGI and select OK.
Step 2: Install Python and Set Up Your Flask Application
-
Install Python: Download and install Python from the official website (https://www.python.org/downloads/). Make sure to add Python to the system PATH during installation.
-
Install Flask: Open a command prompt and run the following command:
pip install flask
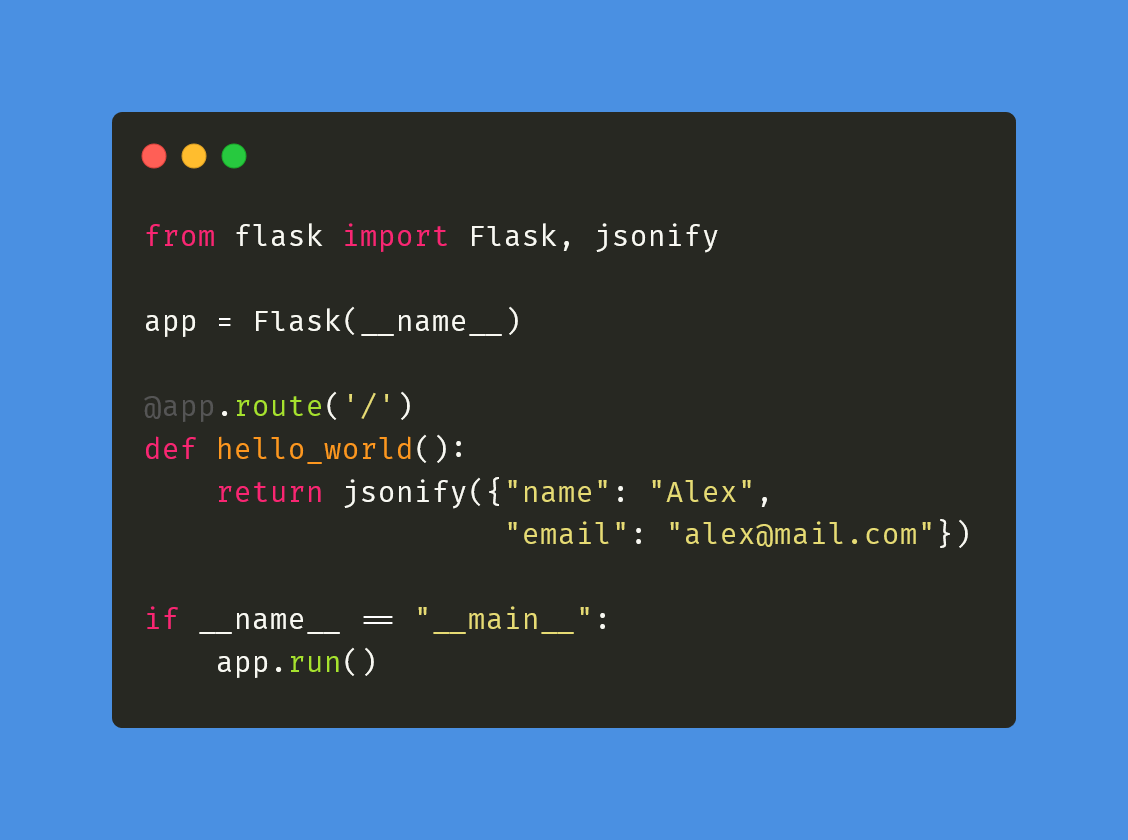
3. Create a Simple Flask App: Create a new directory for your Flask app and navigate to it. Create a Python file (app.py) with the following content:
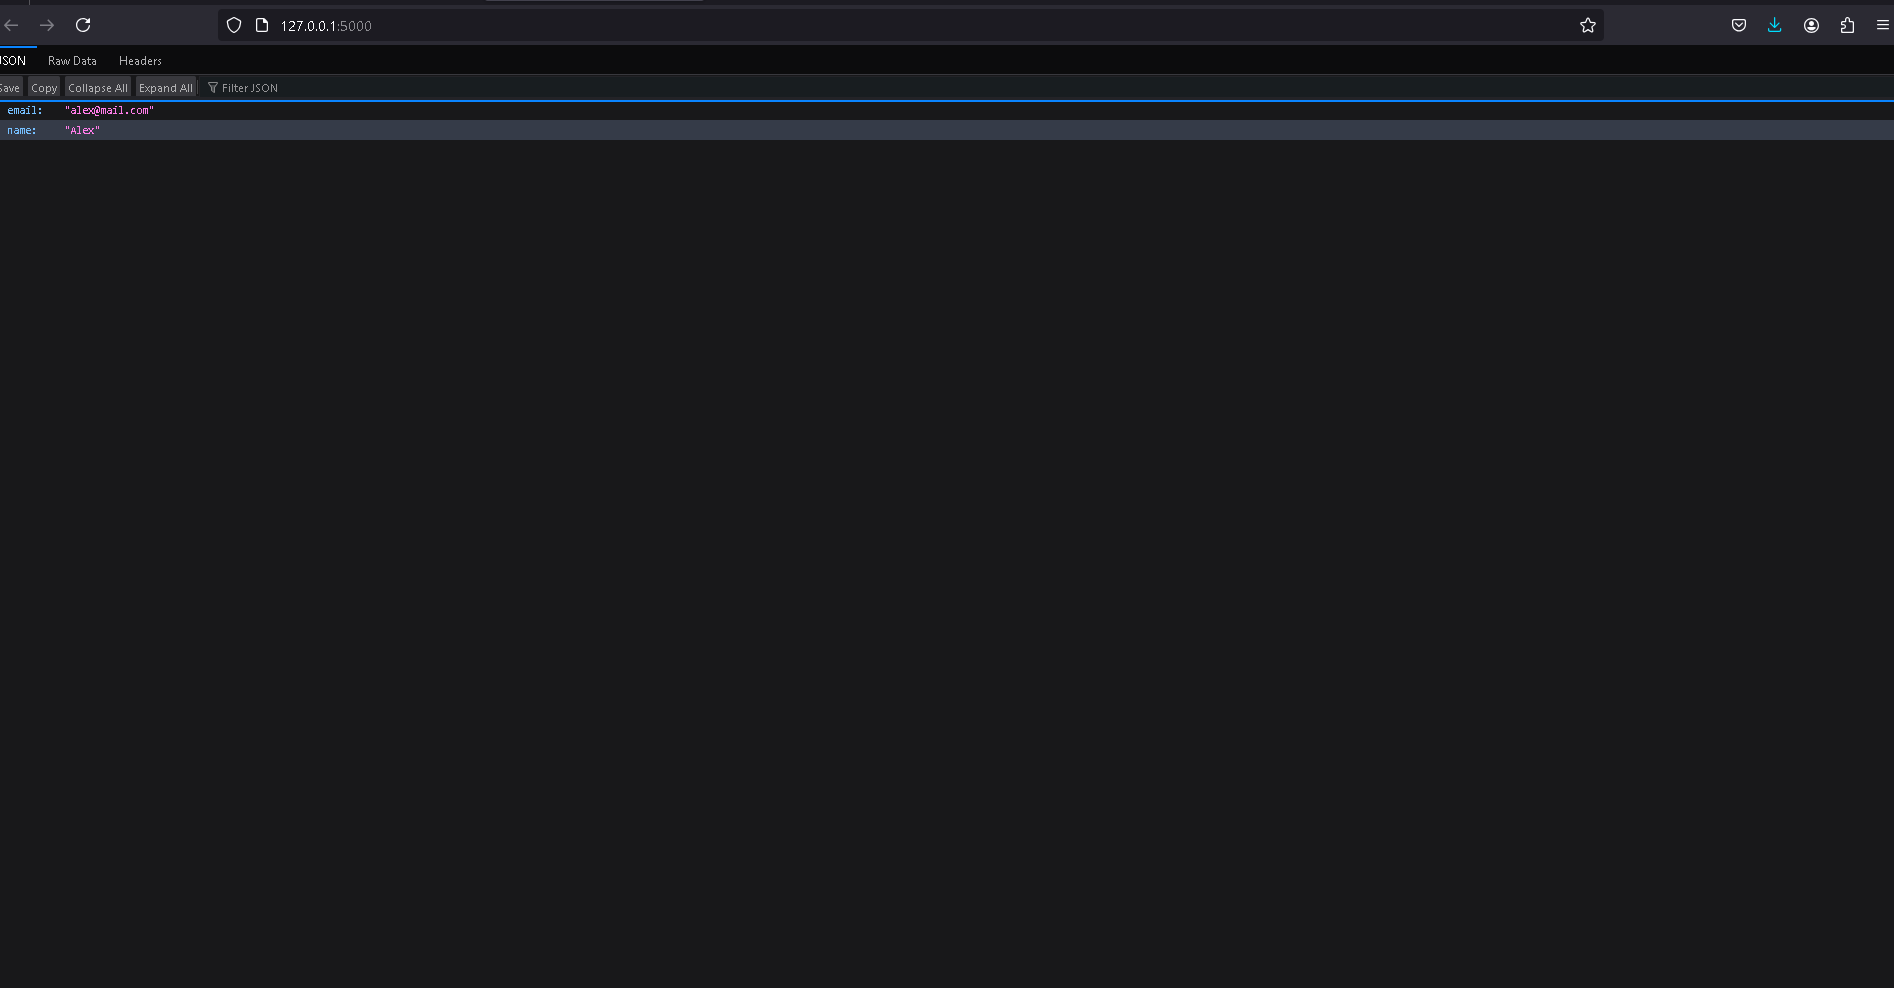
4. Run the app.py file and navigate to http://127.0.0.1:5000/ in your browser.
Step 3: Set Up FastCGI for Python
-
Install
wfastcgi:wfastcgiis a Python package that enables FastCGI for IIS. Install it using pip:pip install wfastcgi
- Configure
wfastcgi: After installing, run the following command to configurewfastcgi:
wfastcgi-enable
Step 4: Configure IIS for Your Flask Application
-
Create a New Website in IIS:
- Open IIS Manager.
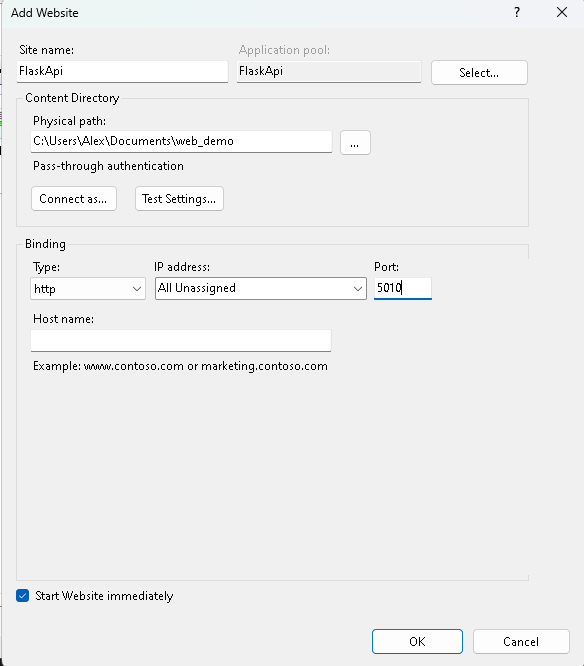
- In the Connections pane, right-click Sites → Add Website.
- Enter a site name (e.g., "FlaskApp").
- Set the Physical path to the directory where your Flask app resides.
- Choose a Port (e.g.,5010 or another available port).
- Click OK to create the website.
-
Add a Handler Mapping:
- In IIS Manager, select your new site.
- Double-click Handler Mappings.
- On the right, click Add Module Mapping....
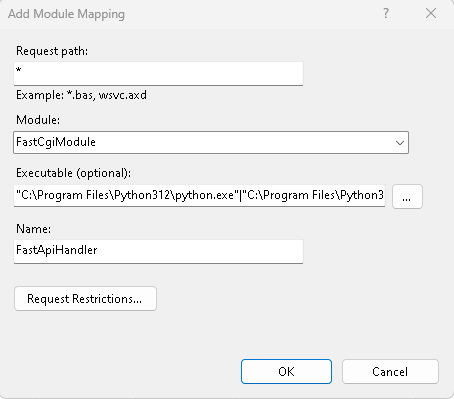
- Enter the following settings:
- Request path:
* - Module:
FastCgiModule - Executable: "C:\Program Files\Python312\python.exe"|"C:\Program Files\Python312\Lib\site-packages\wfastcgi.py" (your executable from step 3)
- Name:
FastApiHandler - Click on Request Restrictions..
- Uncheck "Invoke handler only if request is mappeed to"
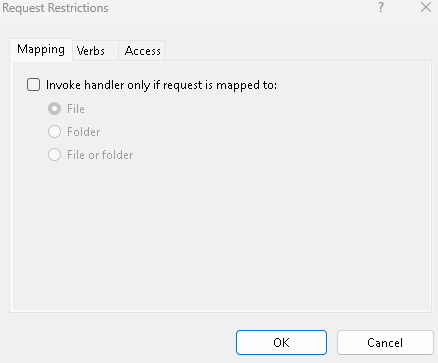
- Request path:
- Click OK.
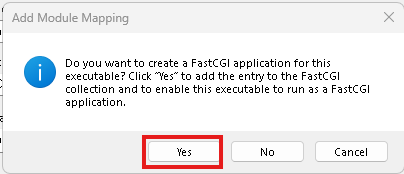
- Click Yes
-
Configure FastCGI Settings:
- Click on FastCGI Settings in IIS Manager (available in the Features view).
- Find the entry for
python.exeand select it. - Click Edit... on the right-hand side.
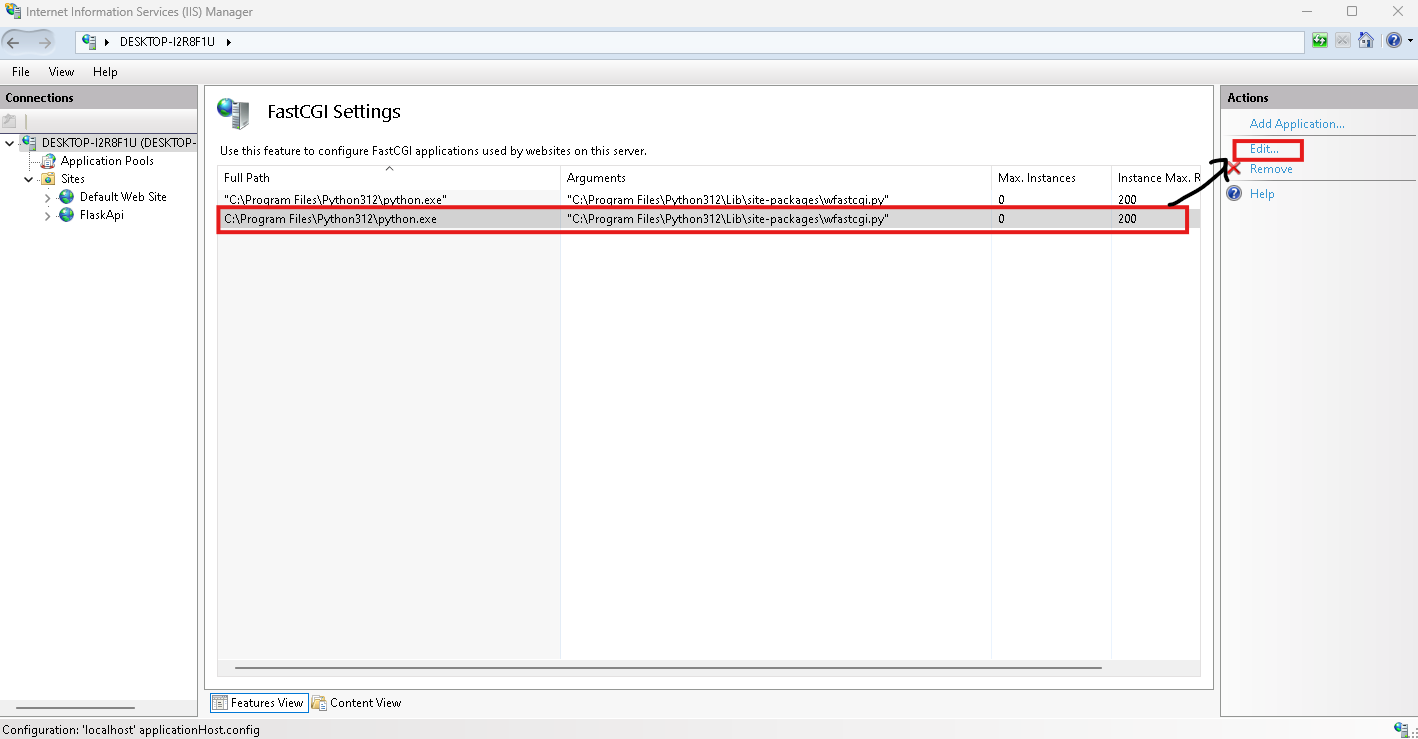
- Add an environment variable with the following values:
- Key: PYTHONPATH
- Value: C:\Users\Alex\Documents\web_demo (yours path dir)
- Key: WSGI_HANDLER
- Value: app.app
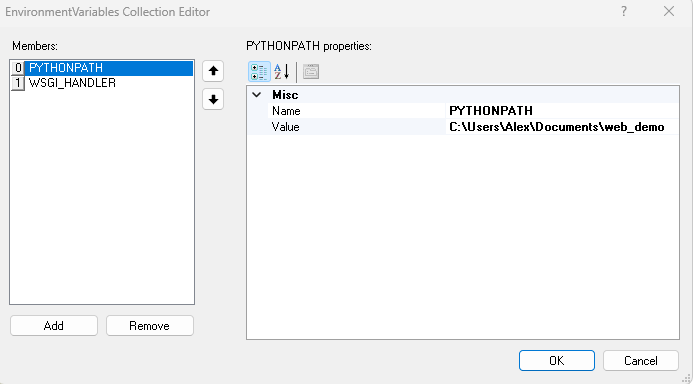
- Click OK to save.
Step 5: Test Your Flask Application
-
Start Your IIS Website: Ensure that your newly created site is running in IIS Manager.
-
Access Your Application: Open a web browser and navigate to http://127.0.0.1:5000/ or the IP address and port you configured. You should see your Flask app running with the
{"email":"alex@mail.com","name":"Alex"}message.
Conclusion
You've successfully set up and run a Flask application in IIS using FastCGI. This setup is suitable for deploying Python web applications in a Windows environment where IIS is the preferred web server. With the power of IIS and the flexibility of Flask, you can now serve Python-based web applications in a production-ready environment.
Troubleshooting Tips
- Permission Issues: Ensure that the IIS user has permission to access the Python executable and your Flask application files.
- Navigate to the directory of your Flask app, right-click, and select "Properties." Then, go to the "Security" tab and click "Edit." In the dialog that appears, click "Add" and enter
IIS_IUSRS. 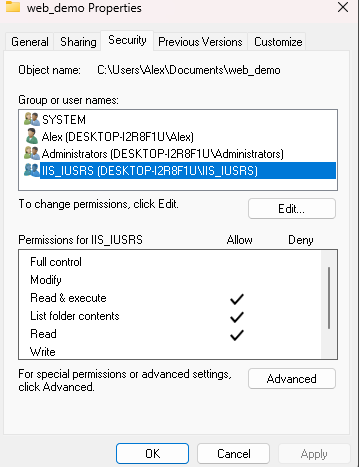
- Navigate to the directory of your Flask app, right-click, and select "Properties." Then, go to the "Security" tab and click "Edit." In the dialog that appears, click "Add" and enter


Comments (0)